
Sooo, I began searching for a good jeweler's bench and nearly lost my cookies at the prices! They were so expensive, and didn't seem to be very well-made or sturdy.
So I began searching for DIY options and came across this AMAZING tutorial called Frankenbench.
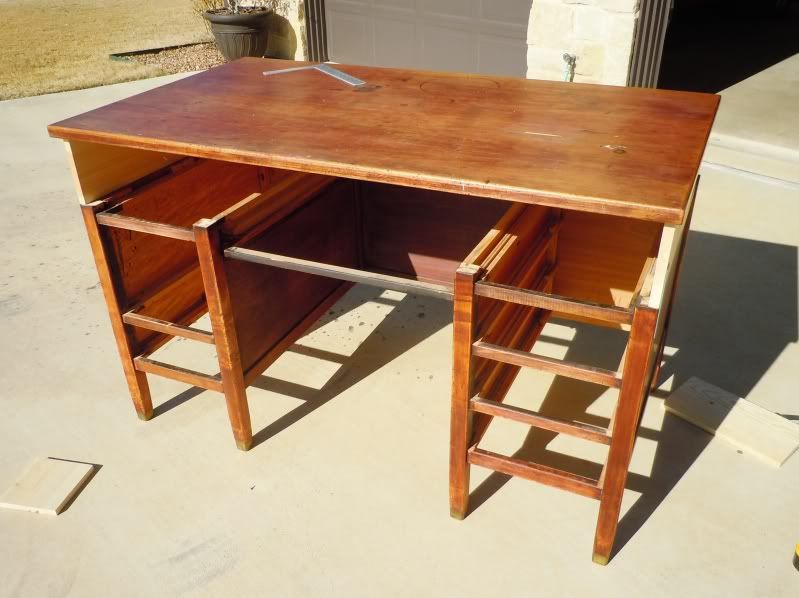
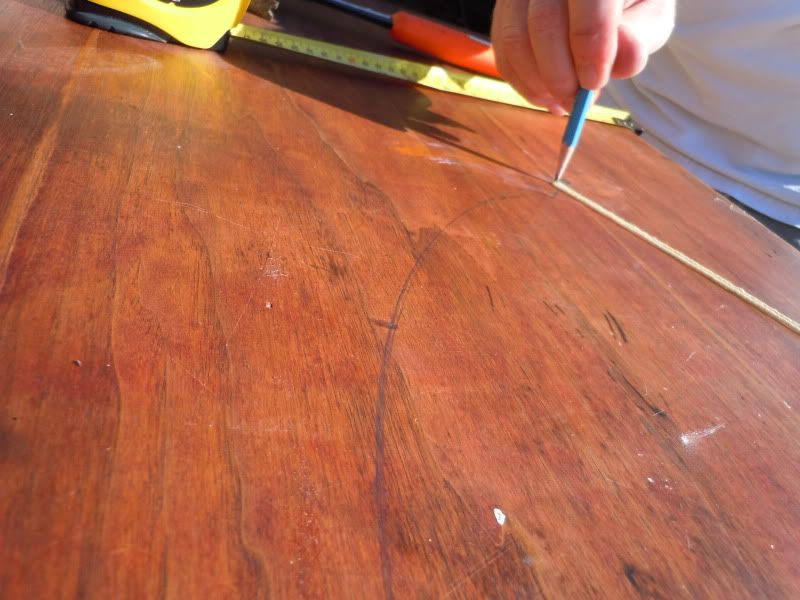
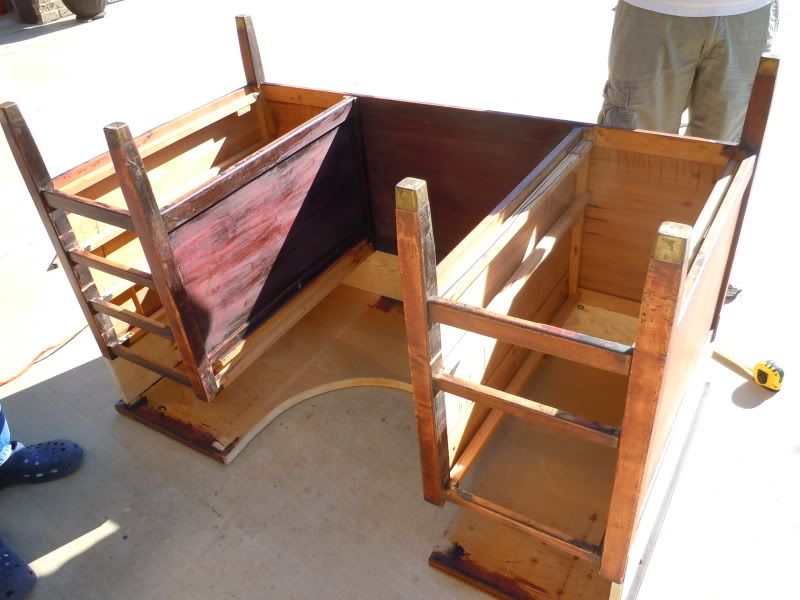
So I began scouring Craigslist <<Oh Craigslist...how I love thee!>> for a "solid wood desk" and found this gem.

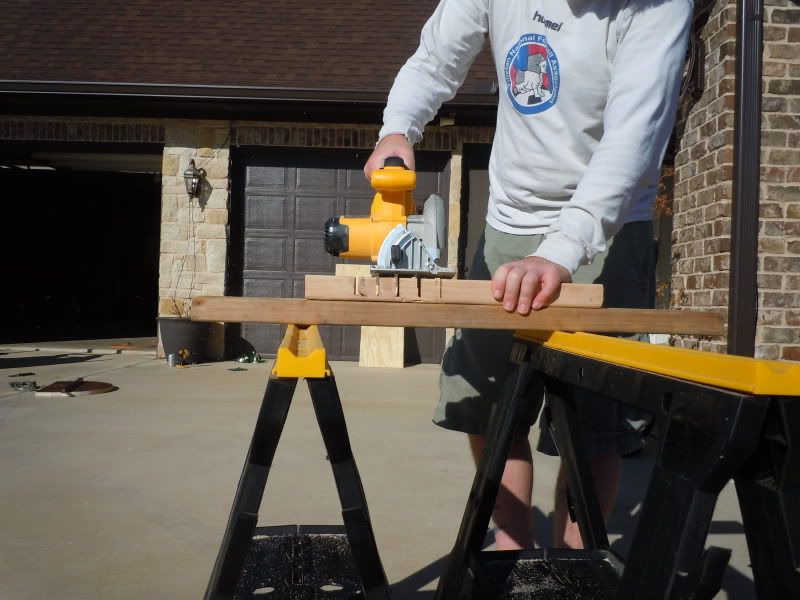
For the project I called in the BIG GUNS aka my hubby and father-in-law. They were definitely more skilled with the power tools than I, so I was super grateful for all of their help.
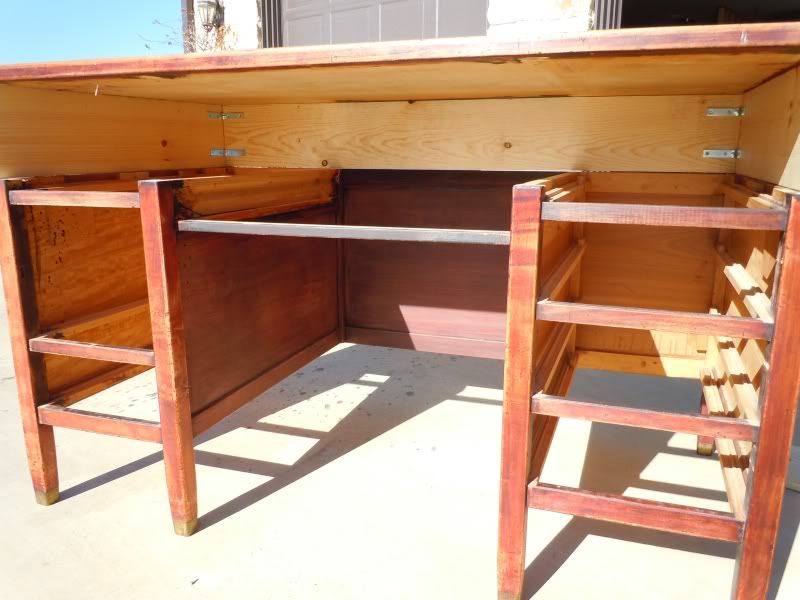
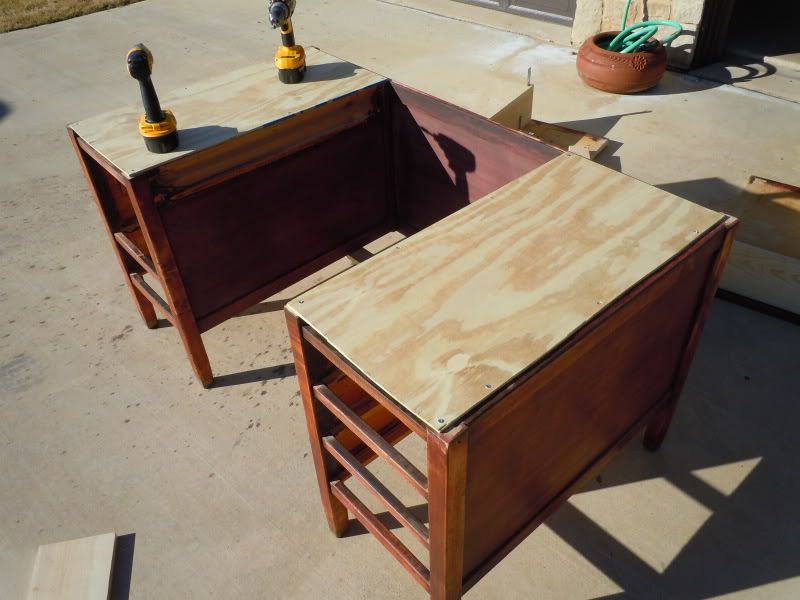
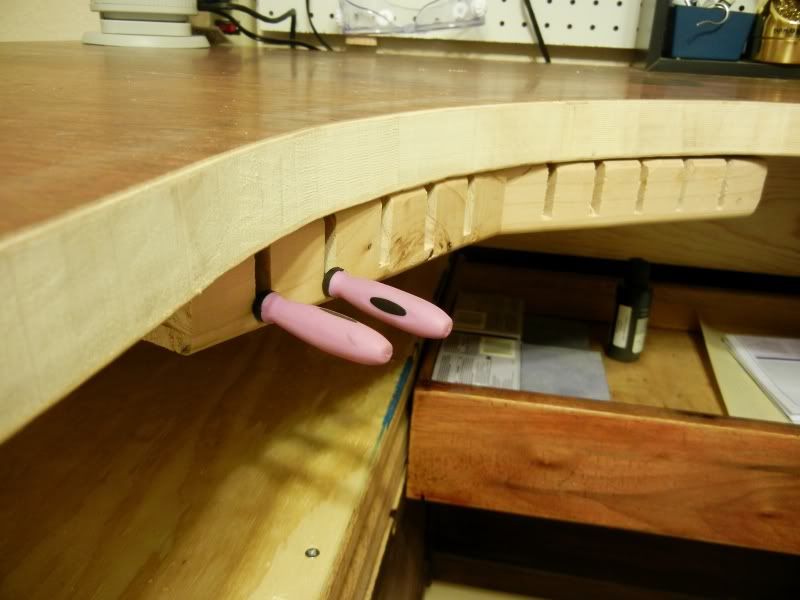
Here is the desk after the riser had been finished. This was before it was attached with the L-brackets, as we still had to put the plywood down on top of the drawer area.
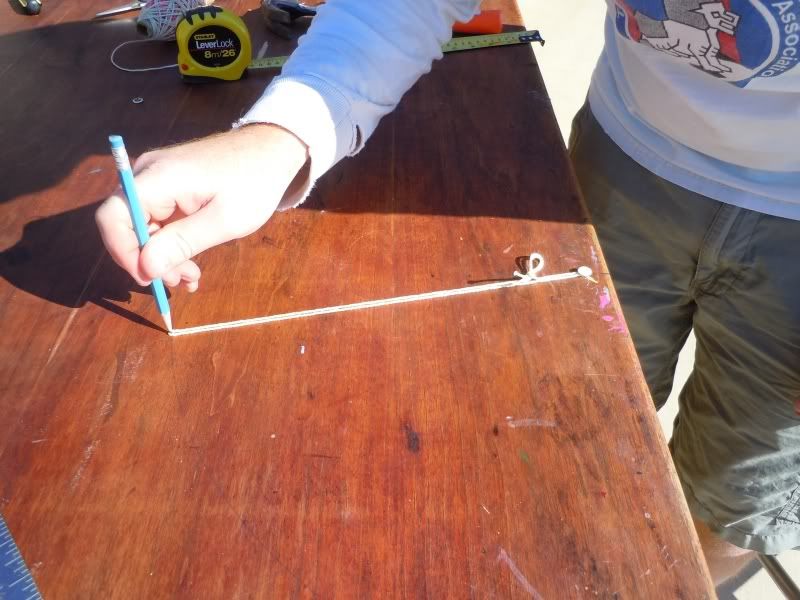
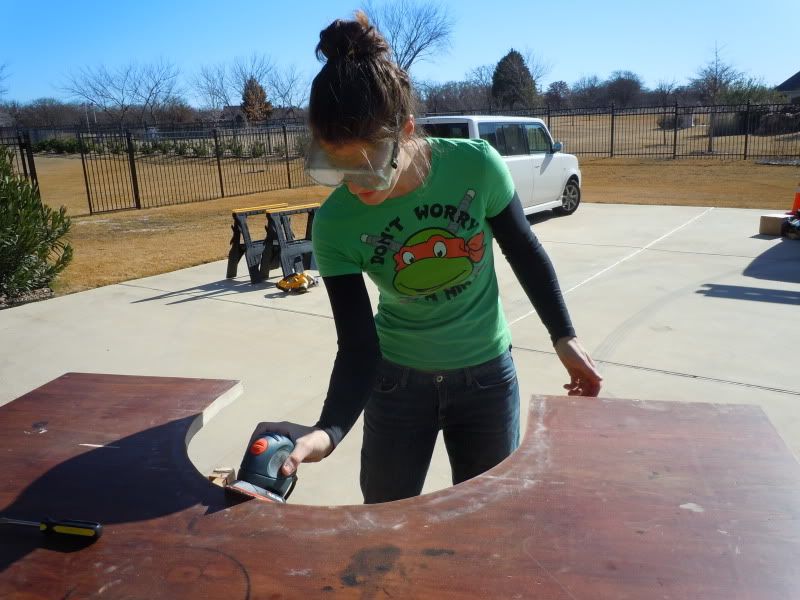
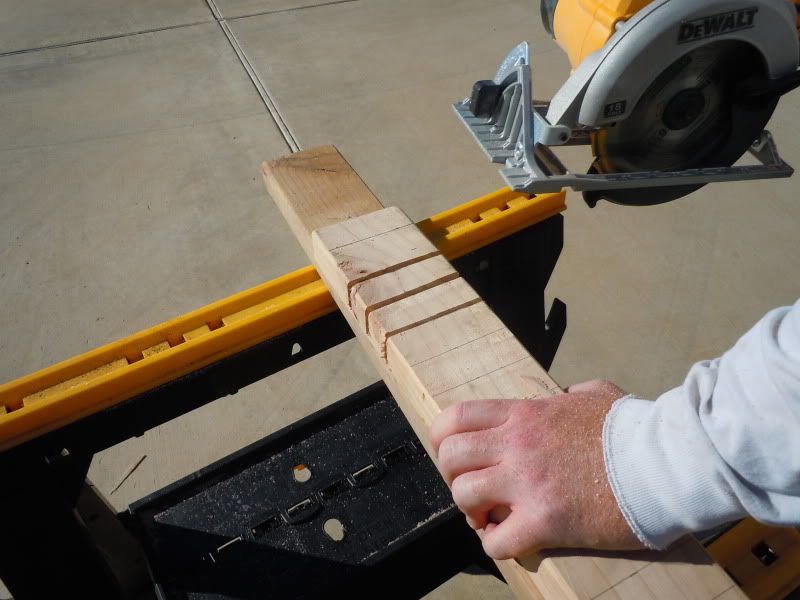
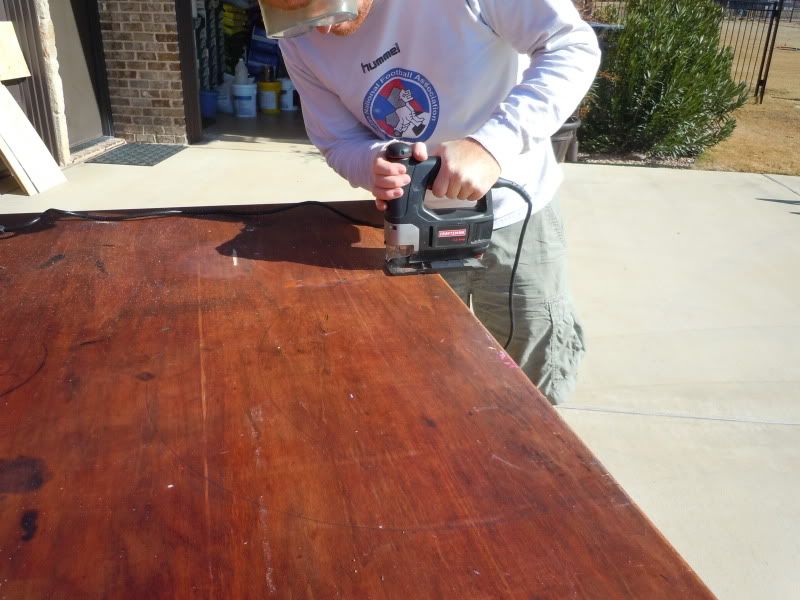
Time to cut! We used a handheld scroll saw. It was so loud!

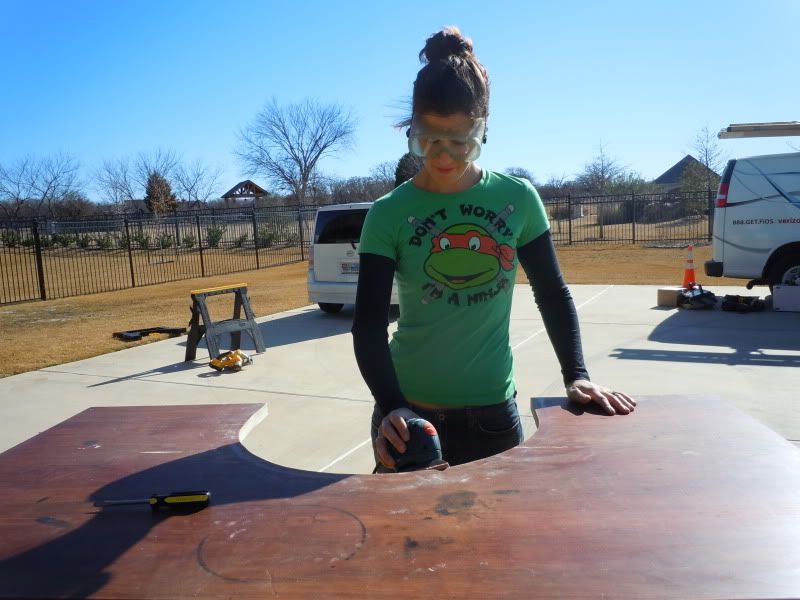
Next up was sanding, and I am a pro at this. I even got to use my father-in-law's "Mouse" sander. It was so easy, and AWESOME. I want one!

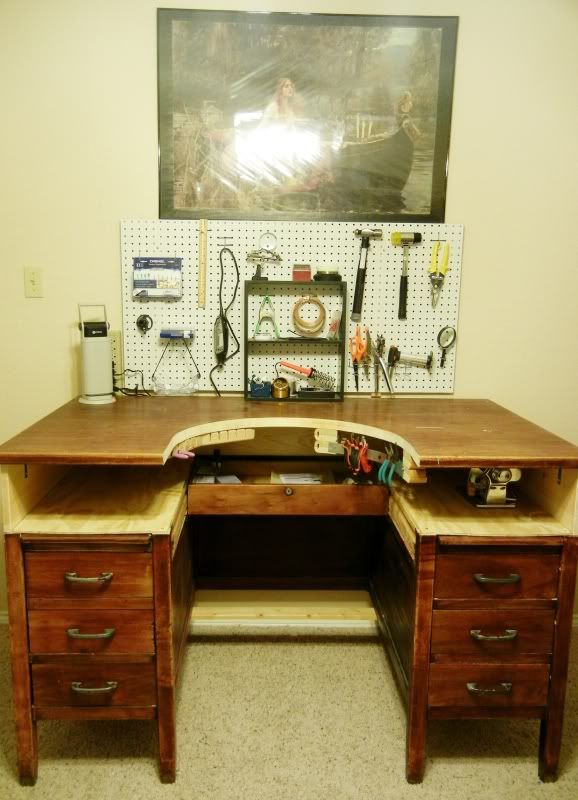
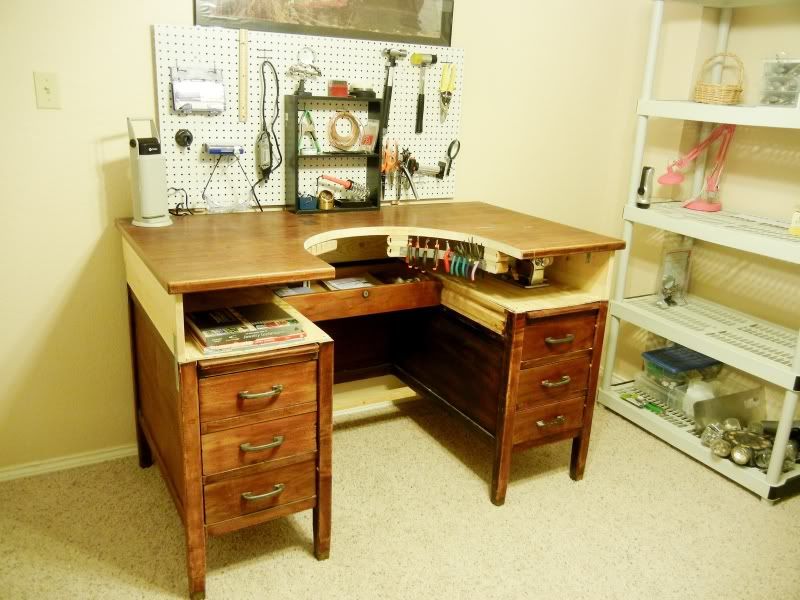
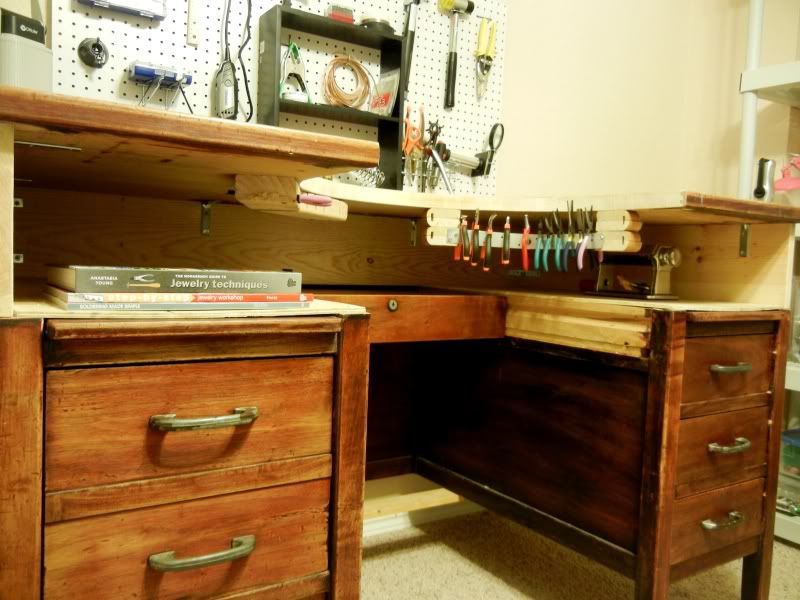
Here it is all set up in the craft room!
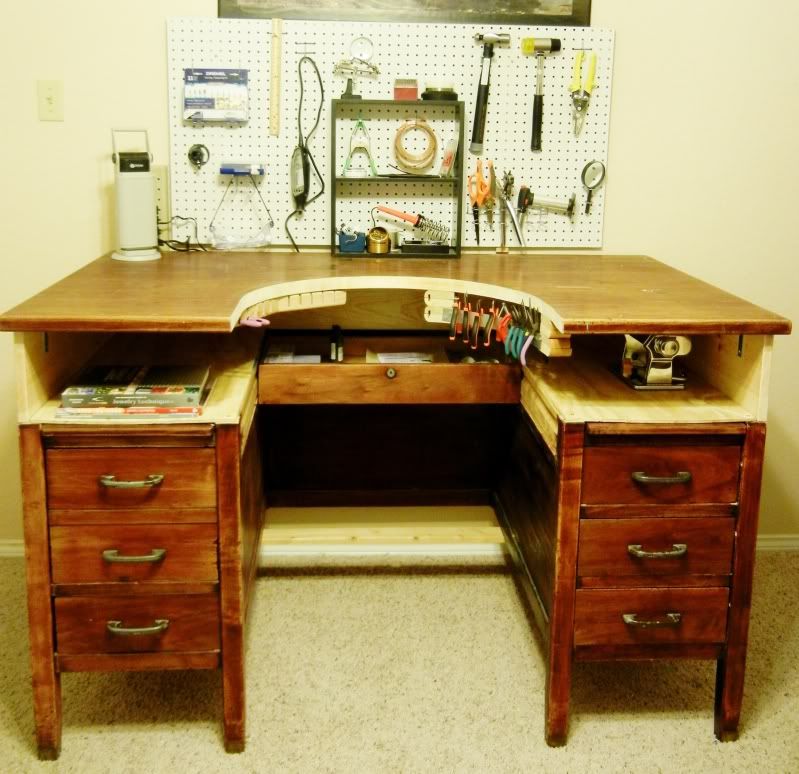
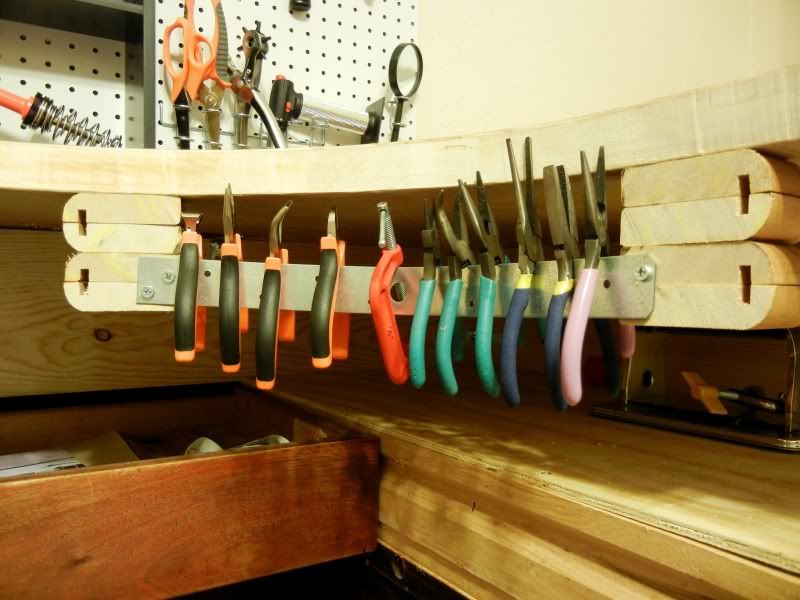
As you can see we added a plier holder using a bent metal bracket.
We also put up pegboard to hold all of my tools

Here is the file holder all attached (still need to put the rest of my files in there)
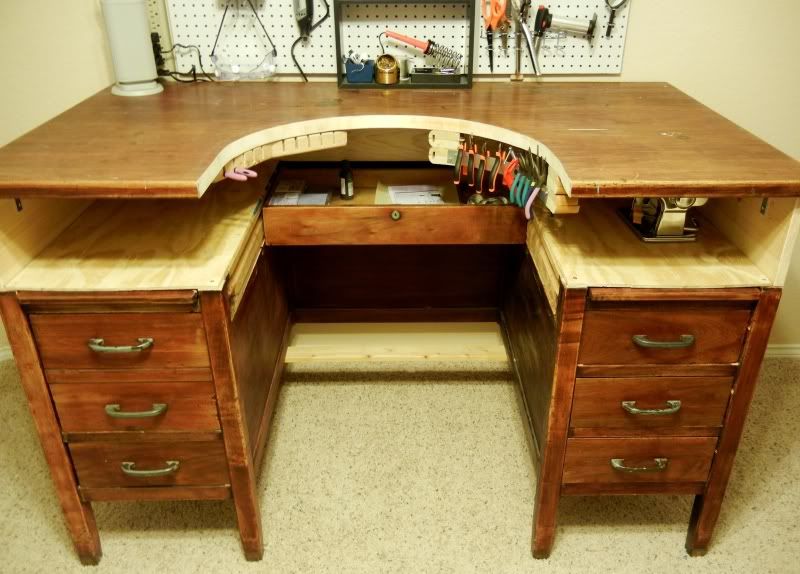
Some more views:
You can see that middle drawer in this picture. We cut it down so that it wouldn't be sticking out into my work area.

I AM BEYOND ECSTATIC!
The total cost of this project was $85 for everything, screws, wood, desk, EVERYTHING, including the pegboard!
AND
don't forget to enter my giveaway for some amazing <<AND FREE>> DIGITAL SCRAPBOOKING SOFTWARE!
Giveaway ends 1/12 at 12:01a.m. CST
The total cost of this project was $85 for everything, screws, wood, desk, EVERYTHING, including the pegboard!
AND
don't forget to enter my giveaway for some amazing <<AND FREE>> DIGITAL SCRAPBOOKING SOFTWARE!
Giveaway ends 1/12 at 12:01a.m. CST
PARTYING ON THESE FABULOUS BLOGS!


33 COMMENTS:
WOW!! What great organization! I am impressed! And your tip for drawing a circle is genius! Thanks for linking up to Oopsey Daisy!! XOXO
This is such an amazing project! I feel like such a looser right now as I am struggling a bit to reupholster this chair I am working on! Great job!
that is so awesome! what a fabulous area to work in!
Wow, wow, wow!! What an AWESOME work desk!! I LOVE that you made it happen with an old used desk, and called in your 'big guns' to do all the many details of making your idea work! I am so interested in getting involved with the next step up of jewelry making, and can see how an area, assigned to just that, would be a huge help! Thanks so much for sharing your great pictures...kudos to you, your hubby & your FIL... awesome job!!
LOVE it! I am also a jewelry designer and would love a work space like this. I am constantly stalking Craigslist anyway so i should add wood desk to my list!
problem is my studio also has to be hubbys office and guest room:( may not be able to fit this size desk. Yours is awesome!
cindy
@Alison @ Oopsey Daisy Oh thank you so much!
@Sweet Harvey LLCOh my goodness don't you dare say that! Keep at it...you'll get it done and it will look fabulous!
@robin rouch Thank you!!
@VivaCindyDefinitely keep stalking Craigslist...there were so many on there when I looked, and all different sizes so you can find one that works for your co-workspace :) Thank you so much!
Amazing! You should join me in Handmade 52! http://raisingoranges.blogspot.com/2012/01/handmade-52.html
How awesome is this!!! Great job by all! Sure would like one.
I'm a canine mom too!
Hi Maureen, stopping by from Simply Designing link party. Of course you should be excited to have that amazing jeweler's bench! I'm openmouthed! :)
Greetings from Spain
As someone who also designs and creates jewelry I was really interested in your project. Is your work station something you designed yourself or had you seen one created previously? I hope you enjoy many hours enjoying your new jewelry making spot. I am now a follower of your blog and look forward to return visits. I invite you to join me as well at http://atastefultouch.blogspot.com Hugs, Gayle.
Oh my gosh Maureen! That is so awesome!!! I love that TMNT shirt by the way :D
wow.. This is fabulous.. Love the idea! I am going to feature this on Friday.. be sure to check it out..
Thanks for linking
Love
Hani :)
@KatieLinked up!
@KatySearch Craigslist and do your own! Seriously, it was quite simple and inexpensive!
@IsThank you so very much!!
@MindiThank you! That's one of my favorite shirts :D
Cannot wait for you to get to TX!
@Hani@CraftionaryOh wow! Thank you...I'll be sure to stop by to thank you some more on Friday!
Beautiful. This has my head swimming about how I could create something similar.
I found you on Handy Man Crafty Woman.
Fantastic! What a great workroom! Thank you for linking it to Home Sweet Home!
Sherry
Hi Maureen, your jewelry making desk is to die for. When I make my jewelry I end up sometimes in front of the TV, other times at the computer, never where I should be, in a properly appointed place, LOL I can imagine just how happy you will be when you create. Thanks for sharing. I have recently found your blog and am now following you, and will visit often. Please stop by my blog and perhaps you would like to follow me also. Have a wonderful day. Hugs, Chris
http://chelencarter-retiredandlovingit.blogspot.com/
Inspiring project! And the storage for the files and tools is genius! TFS!
Ah, reminds me of my days as a repair jeweler. I went to a small art school and then worked for Sterling Inc for about five years. I bought a bench early on and spent way more than you did, lol. One thing you did though, about making the drawer shorter. Benches actually come with a drawer that you slide out and catch your scraps/gold dust, etc. It also helps save your pants if you drop something hot, like your torch. :-) Super impressed with your desk to bench makeover. :-)
Absolutely love this, and you posted at just the right time! My husband is currently working with me to redo my shop space. Thank you!!
~christy
www.christylsalas.blogspot.com
Absolutely love this, and you posted at just the right time! My husband is currently working with me to redo my shop space. Thank you!!
~christy
www.christylsalas.blogspot.com
This is exactly what I was looking for, great post and the pictures are a great help. You are awesome. Thanks!
Jewelry has always played a vital role in lending confidence and beauty to the human body. It has been considered as the display of wealth and good taste since time immemorial.
http://www.stgeorgejewelers.com
You are so lucky to have 2 skilled people to help you! I'm pretty hand, but I have my limits. How did you get the desk top off the desk?
Thanks for this great idea. Im building my own, I have the bench, but I haven't started yet. :) https://fridayfridablog.wordpress.com/2016/09/26/jewellers-frankenbench/
Thank you for the inspiration. I worked in the jewellery trade many years ago and have recently been toying with the idea of getting back into it for myself. With the set up costs being so high, this is an excellent alternative and I can make a bespoke bench to suite my own preferences. I already have my eye on a £15 desk on eBay so will hopefully be making my own bench very soon.
Post a Comment